A Collector's Guide
Building A Lightsaber
The Collector's Chronicle: A Granular Guide to Building Your Own Lightsaber
By Shing
Last updated: 21 Apr 2026
One of the most common questions I see from newcomers entering this wild ride is: "How do you go about building a custom saber?" Do you machine the hilt yourself? Do you buy a kit? What does "installation" even mean?
Let me be clear up front: I, Shing, am primarily a serious, high-end lightsaber collector. Save for basic engineering common sense and principles, I know next to nothing about making hilts, customizing, or programming. The information below is what I have gathered from reading, observing, and learning from various people—particularly some very generous installers in the community.
When I researched, the answers ranged from wonderfully simple snap-together kits to intensely sophisticated machining operations. I've compiled those insights, stripped away the egos, and combined them with technical research from across the hobbyist landscape.
In this guide, I will break down the practical steps of building a custom lightsaber across three distinct tiers of complexity.
A Crucial Warning
This is not sponsored content. Any reference to any companies here is not an endorsement. At any time, businesses in this hobby can be fragile and companies close. Always remember the classic failure points in a niche, hype-driven business:
- — Riding a hype bubble without building sustainable capacity.
- — Taking more money than the operation can responsibly fulfil.
- — Prioritising new cash (RTS, cons) over old obligations.
- — Letting staff burn out and leave while the backlog explodes.
- — Relying on payment-platform time limits and fragmented victims.
- — Managing optics and group narratives instead of fixing root problems.
The Modular Assembly (VHC and MHS)
This is the simplest entry point into the hobby. If you want a custom look without touching a soldering iron or a lathe, this is generally your path. This approach relies on standardized threaded parts that screw together, much like high-end metal LEGO bricks.
Designing the Hilt
There are two dominant standards: VHC (Variable Hilt Components) and MHS (Modular Hilt System). VHC parts are currently the most accessible and are widely championed by standout vendors like ES Sabers and Vire Sabers. From what I understand, both of these companies offer good quality, service, and cross-compatible parts that make designing your own one-of-a-kind hilt incredibly straightforward. (Corvus Saber Foundry is another notable VHC vendor). Meanwhile, MHS is the proprietary system developed by The Custom Saber Shop. Keep in mind, you generally cannot mix VHC and MHS parts without specialized adapters.
Using an online saber builder tool, you select your components: an emitter (where the blade goes), a switch section, a grip (the main body), and a pommel (the end cap). If you need to connect two male or two female threads, vendors sell specific couplers to bridge the gap.
Sourcing the Core
Instead of wiring electronics from scratch, many opt to purchase a pre-assembled "drop-in core." This is a cylindrical plastic or metal chassis that already contains the soundboard, battery, speaker, switch, and LED/NeoPixel connector. You simply slide this core into your assembled hilt. While you can source these cores blindly from mass manufacturers on AliExpress, the consensus is that the smart move is to buy directly from reputable domestic sellers like Vire Sabers or ES Sabers. Purchasing your core from the same place you buy your VHC hilt parts typically guarantees compatibility, and you theoretically benefit from their quality control and customer service.
Assembly and Blade Installation
Once the core is slid into the hilt, you align the switch on the core with the switch hole on your hilt section. A small retention screw is tightened to lock the core in place. Finally, you insert your polycarbonate blade into the emitter and tighten the blade retention screw. You now have a fully functional, custom-designed lightsaber.
The Semi-Custom Installation + Building Your Chassis
This is the middle ground and what I observe to be the most common route for serious collectors. In this approach, you purchase a specific, pre-machined empty hilt—often a replica of a character's saber from companies like KR Sabers, Korbanth, or Saber Forge. Because these hilts are designed with specific internal geometries, a universal drop-in core will not work. You must perform an "installation," which means wiring the electronics into a custom chassis.
Acquiring the Chassis
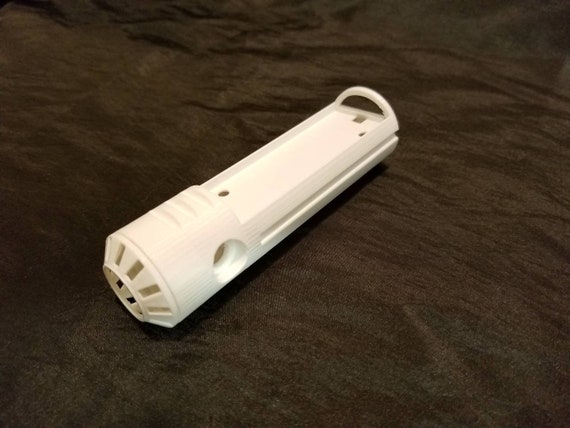
Chassis are designed for specific hilts—they are not universal. You must buy a chassis specifically modeled for your exact hilt version. Loose electronics can severely damage the motherboard or even injure the user. Chassis are typically 3D printed from FDM plastic or SLS nylon, though high-end "Master Chassis" builds utilize machined brass or aluminum for durability. Vendors like GOTH-3Designs, Saberbay, and installers like Tierfon Orbital specialize in these intricate internal structures.
How to Build a Chassis
See also our full guide: Chassis Types: The Anatomy of The Hilt. While many buy pre-made chassis from vendors like GOTH-3Designs or Saberbay, designing and printing your own is a core part of the hobby for many builders.
1. Measurement and CAD Design
The process begins by measuring the exact internal diameter (ID) of the empty hilt using digital calipers. Most standard hilts have a 1-inch (25.4mm) or 1.10 to 1.25-inch ID. Using CAD software like Autodesk Fusion 360, builders create a cylindrical model slightly smaller than the hilt's ID (leaving about 0.5mm to 1mm of clearance).
The designer then models specific cutouts for the electronics. To ensure a perfect fit, many builders download community-made 3D CAD files of the actual components (like the 18.9×29.9×4.5mm Proffieboard v2.2 or a 28mm speaker) and subtract those shapes from the main cylinder. A critical design step is adding internal channels along the sides or bottom of the chassis so wires can be routed cleanly without getting pinched when the chassis slides into the metal hilt.
2. Wiring Methods: Top vs. Bottom
When designing the soundboard tray, builders must choose a wiring method:
- Top Wiring: The soundboard sits on a flat bed. Wires are soldered to the top pads and remain visible. This is easier to design and install.
- Bottom Wiring: The chassis has a customized tray that allows wires to run underneath the board and up through specific holes to the solder pads. This results in a much cleaner, wire-free appearance but requires precise CAD work.
3. 3D Printing Materials
Once the STL file is exported, it must be printed. The choice of material is hotly debated among builders:
- FDM (PLA+ or PETG): The most common and accessible. PLA+ is cheap and prints easily, though it lacks high heat resistance. PETG offers better durability and heat resistance.
- FDM (Nylon): Highly recommended by serious duelists for its extreme toughness and impact resistance.
- Resin: Offers incredible detail, making it perfect for intricate "crystal chamber" reveals. However, standard resin is brittle and has poor impact resistance, making it risky for heavy dueling sabers unless specialized "ABS-like" tough resins are used.
- SLS Nylon: The professional commercial standard. It is extremely durable and has a slightly porous, matte finish. Many builders outsource their final designs to commercial SLS printers.
4. Assembly Order
Installers emphasize that a chassis must be assembled in a specific order, often working from the deepest internal component outward:
- Weathering/Painting: If the chassis has decorative elements, they are painted first.
- Crystal Chambers & Accents: Small accent NeoPixels and crystals are glued in and wired first, as they are often buried deep in the structure.
- Speaker: The speaker is usually installed at the pommel end and wired up through the channels.
- Soundboard & Battery: The board is seated in its tray, and the battery contacts (or pre-wired battery) are installed.
- Switches & Connectors: Finally, the power/kill switches are wired, and the top pogo-pin connector (which interfaces with the blade) is installed.
Gathering the Electronics
A lightsaber is essentially a tiny IoT device wrapped in aluminum. From what installers share, you will need:
| Component | Description & General Recommendations |
|---|---|
| Soundboard | The brain of the saber. Proffieboard (v3.9) is considered the open-source king, offering unmatched customization. CFX (Crystal Focus X) is the premium commercial standard. Golden Harvest v4 and Verso are often cited as offering easier configurations with large solder pads ideal for beginners. |
| Battery | A high-drain 18650 protected Li-ion cell (typically 15A discharge for NeoPixel builds). Button-top cells are generally preferred for spring-loaded sleds. |
| Speaker | Usually a 22mm, 24mm, or 28mm 3W/4ohm bass speaker. Smuggler's Outpost is widely regarded by many builders as offering the best speakers in the hobby. |
| Connectors | A NeoPixel pogo-pin PCB for the emitter to connect to the blade. |
| Wiring | PTFE (Teflon) wire seems to be the industry standard because the insulation does not melt or shrink back when soldered. Builders often use 22-AWG for power lines and 28-AWG for data and switch lines. |
The Wiring and Soldering Process
I do not solder, but installers emphasize that this requires a temperature-controlled soldering station (around 350°C), lead-free solder, flux, and extreme patience.
- Harness Preparation: Cut PTFE wires to length, strip the ends, and pre-tin both the wire ends and the board pads with solder. Use flux generously to ensure clean joints.
- Chassis Routing: Route the battery leads, speaker wires, and switch cables through the designated channels in your 3D-printed chassis. A common trick I hear about is splicing wires at components (like switches) rather than crowding the soundboard.
- Soldering the Board: Carefully solder the wires to the microscopic pads on your soundboard following the specific wiring diagram for your board.
- Securing Components: Once tested, secure all joints and the board with E6000 adhesive or a dab of hot glue to absorb the shock of dueling.
Board Flashing and Configuration
Before sealing the hilt, you must connect the soundboard to your computer. For a Proffieboard, this apparently involves installing the Arduino IDE, adding the Proffieboard plugin via the Boards Manager, and uploading a specific configuration file (ProffieOS) that dictates blade effects, sound fonts, and motion sensor calibration. CFX and Golden Harvest boards are generally configured by editing text files directly on their SD cards.
Building a NeoPixel Blade
While you can buy pre-made blades, building your own is a rite of passage for many. A standard NeoPixel blade consists of a 1-inch outer diameter polycarbonate tube. Inside, builders sandwich a high-density LED strip (like a 144 LED/meter WS2812B or Adafruit Mini Skinny NeoPixel) between two strips of corrugated plastic or diffusion foam. This assembly is inserted into the tube, capped with a glued-on parabolic or bullet-shaped tip, and wired to a flat PCB at the base that interfaces with the hilt's pogo pins.
Full Custom Machining + Building Your Chassis
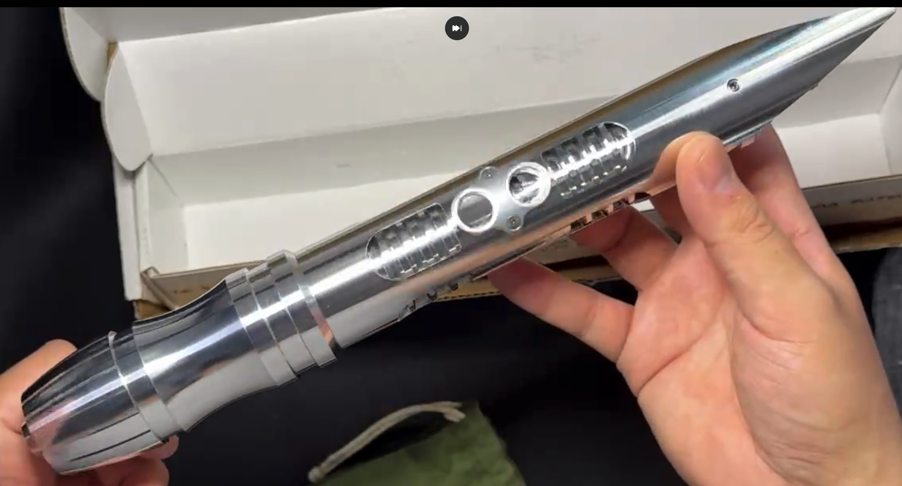
For the ultimate bespoke experience, some builders machine their hilts entirely from scratch. This involves utilizing manual metal lathes and CNC mills to turn raw billets of aluminum and brass into unique pieces of art. This path requires learning everything from shop safety to lathing, milling, 3D printing, electronics, and finish work. It is a labor of love that transforms a simple metal tube into a precision instrument.

Shop Safety and Preparation
Before touching a machine, safety is paramount. Operating a metal lathe or CNC mill requires strict adherence to protocols. A lathe spins heavy metal at high speeds, and entanglement is a severe, life-threatening hazard. The fundamental rules I hear constantly repeated are: no loose clothing, no jewelry, long hair tied back securely, and mandatory use of ANSI-certified safety glasses or face shields. Gloves should never be worn near rotating machinery, as the fabric can catch and pull a hand into the chuck.
What is a Lathe?
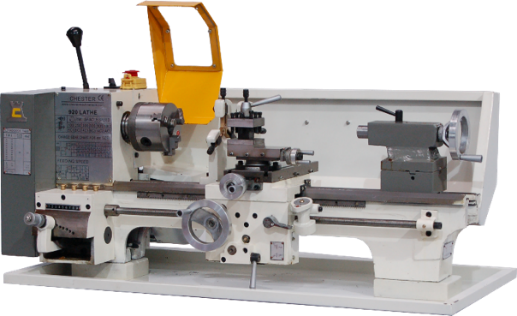
A lathe is a machine tool often called the "mother of all machine tools" because of its versatility and historical importance. Its primary function is to rotate a workpiece on its axis while a stationary cutting tool is used to remove material, shape the piece, or create specific features. The lathe is incredibly versatile — it can produce everything from tiny screws for eyeglass frames to massive gun barrels and rolls for steel mills.
Here is a simple table to help you understand the main parts of a standard engine lathe:
| Part | Function |
|---|---|
| Bed | The foundation of the lathe. It is a heavy base that supports all other parts and absorbs vibrations. |
| Headstock | Located on the left, it houses the motor and spindle that rotates the workpiece. |
| Tailstock | Located on the right, it slides along the bed to support the other end of long workpieces or hold drilling tools. |
| Carriage | The assembly that moves the cutting tool along the workpiece. It includes the apron, saddle, and tool post. |
| Chuck | Attached to the headstock, it is the clamping device that holds your workpiece securely. |
| Lead Screw | A long threaded rod used to move the carriage precisely for cutting threads. |
What is Lathing?
Lathing is the act of performing machining operations on a lathe. The most common lathing operations include:
- Turning: Reducing the diameter of the workpiece along its length to create a cylindrical shape.
- Facing: Machining the very end of the workpiece to create a flat surface and achieve the correct length.
- Chamfering: Cutting a beveled edge at the corner of the workpiece to remove sharp edges.
- Drilling: Using the tailstock to feed a drill bit into the rotating workpiece to make a hole.
Manual Lathing vs. CNC (Computer Numerical Control) Machining
"Lathing" (manual lathe operation) and CNC (Computer Numerical Control) machining are not always separate categories, because a CNC lathe is a common type of CNC machining center. Think of it this way: lathing is a process (creating cylindrical parts by spinning them), while CNC machining is a method of control (using computer code to automate the process). The real comparison is between manual lathing and CNC lathing.
| Feature | Manual Lathing | CNC Machining |
|---|---|---|
| Controller | A human machinist turns handwheels and levers. | A computer reads G-code (programming language). |
| Operator Role | Skilled craftsman: watches, feels, and adjusts in real-time. | Skilled programmer/monitor: sets up the machine, writes code, and oversees a run. |
| Precision | Very good (typically +/-0.001" or 0.025mm). | Extremely high (typically +/-0.0001" or 0.0025mm), repeatable. |
| Speed | Slower, one part at a time. | Very fast, can run 24/7 making hundreds of identical parts. |
| Complexity | Best for simple cylinders, tapers, and threads. | Can create complex 3D shapes, contours, and eccentric features. |
| Cost | Lower initial machine cost. High skilled labor cost per part. | High initial machine cost. Lower labor cost per part for large volumes. |
Lathing the Hilt Body
Builders typically start with raw 6061 aluminum round stock (commonly 1.5-inch or 2-inch diameter billets). The material is secured firmly in the lathe's chuck. From what machinists share, 6061 aluminum is generally considered a pleasure to machine compared to steel, often cut using high-speed steel (HSS) tools or carbide inserts, with Neatsfoot oil or specialized coolants used as a cutting fluid to prevent the aluminum from galling.
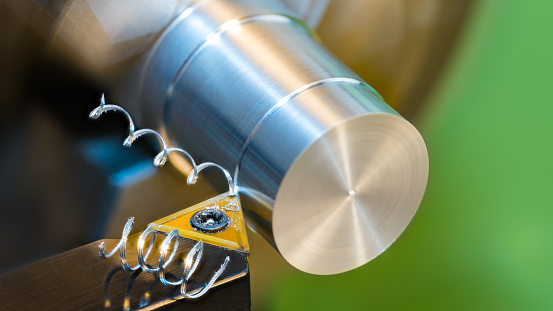
The lathing process generally follows these steps:
- Facing and Turning: The machinist faces the end of the billet to make it perfectly flat, then turns the outside of the metal down to the desired outer diameter for the grip.
- Boring: Using boring bars, the machinist hollows out the inside of the tube to a precise internal diameter. This is critical: the emitter section must perfectly fit a 1-inch or 7/8-inch blade, while the lower grip section must be bored to exactly accommodate the internal chassis (often 1.10 to 1.25 inches).
- Threading: If the hilt is made of multiple segments (e.g., a separate pommel or emitter), the machinist must cut precise male and female threads on the lathe so the parts screw together seamlessly.
- Grooving: Plunge cutting deep decorative grooves directly can cause aggressive vibration or "chatter." Machinists often scribe the extents first and make shallow center cuts to clear the material cleanly.
Milling and Detailing
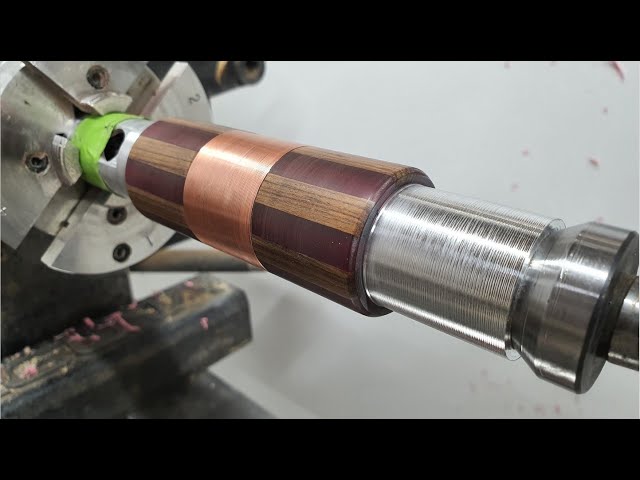
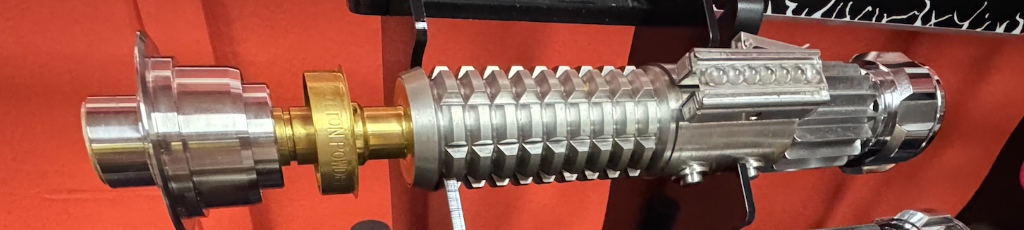
Once the basic cylindrical shape is turned on the lathe, the part is moved to a milling machine (either manual or CNC). A lathe can only make round cuts; a mill is required for everything else. Here, the builder cuts intricate details: slotted emitter windows to let light shine through the sides, precise holes for tactile switches and recharge ports, and flat sections for mounting control boxes. This is where the hilt gains its unique character and breaks away from being just a shiny pipe.
Custom Chassis Design (CAD — Computer-Aided Design)
See also our full guide: Chassis Types: The Anatomy of The Hilt, and refer to Tier 2 above for Chassis Building.
Because the hilt is entirely custom, no pre-made chassis from a vendor will fit. The builder must measure the exact internal dimensions of their newly machined hilt using digital calipers and use CAD (Computer-Aided Design) software (like Autodesk Fusion 360) to design a bespoke chassis.
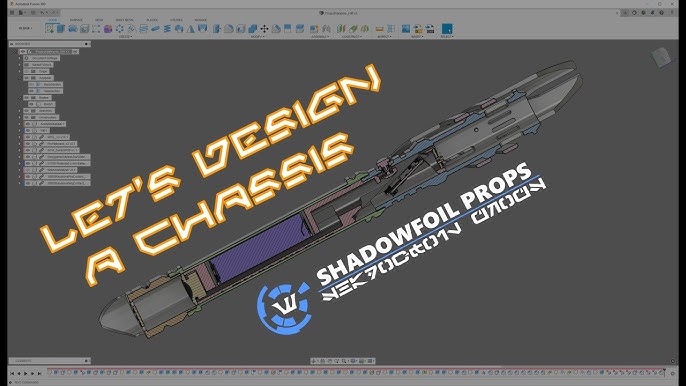
This chassis must securely hold the specific battery, soundboard, and speaker chosen for the build. The designer must account for wire routing channels, ensuring that wires don't get pinched when the chassis is inserted into the metal hilt. The design is then exported as an STL file and 3D printed. While FDM printing works for prototyping, final chassis are often printed in SLS nylon for durability, or resin for extreme high-detail "crystal chamber" reveals.
Finishing and Weathering
A freshly machined aluminum hilt looks too clean for the "used universe" aesthetic of Star Wars. Builders employ various finishing techniques to age the metal:
- Anodizing: An electrochemical process that dyes the aluminum surface black, gold, or other colors permanently. It provides a hard, scratch-resistant finish.
- Chemical Weathering: Using Birchwood Casey Aluminum Black (a chemical oxidizer). The aluminum must be meticulously cleaned with isopropyl alcohol and de-oxidized first. The chemical is applied with a swab or brush, instantly turning the metal a dark, mottled grey/black. It is then distressed with fine-grade steel wool or Scotch-Brite pads to simulate years of battle damage, leaving the dark oxidation only in the recesses to simulate carbon scoring.
- Physical Distressing: Using heavy grit sandpaper, files, and acrylic washes to add physical damage and grime.
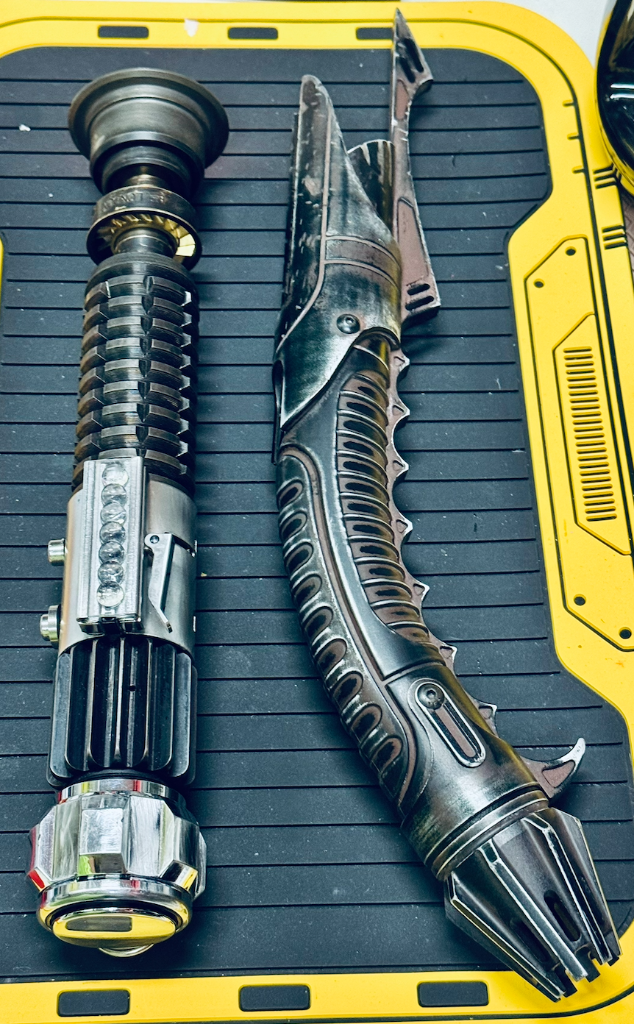
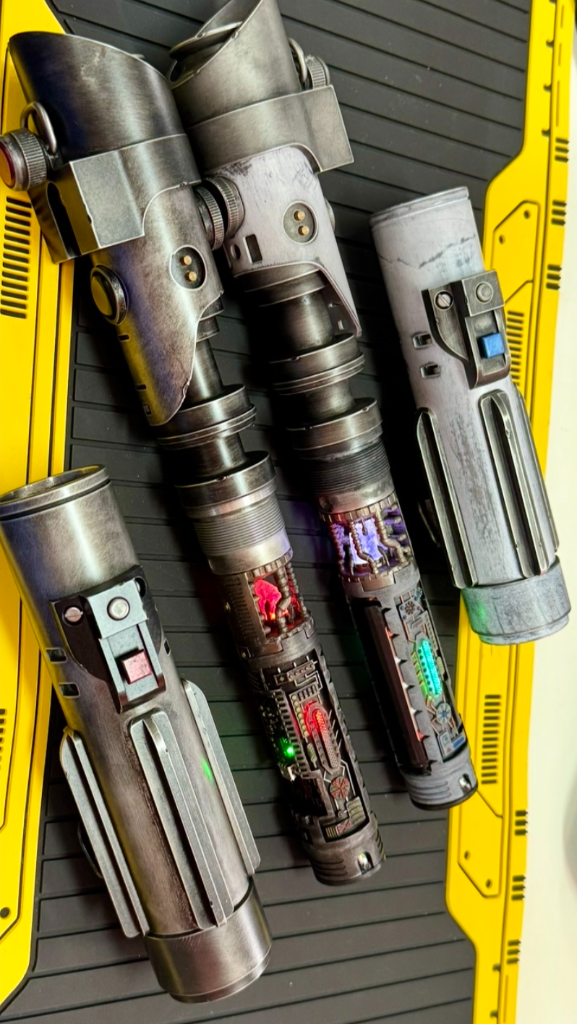
Once the hilt is finished and weathered, the builder proceeds with the same complex electronics installation (as mentioned in Tier 2 above). The Proffieboard is wired up, the NeoPixel blade is constructed, and the components are carefully slid into the custom chassis. The result is a truly one-of-a-kind masterpiece born from raw metal.
The Reality of the Market
As you embark on this journey, keep your eyes open. The lightsaber community is small, heavily concentrated on Facebook, and filled with both brilliant craftsmen and opportunistic sellers. Rival hostility runs deep. Do your research before handing over your money. Verify that the chassis you are buying actually fits the specific version of the hilt you own. If an installer's engineering logic seems questionable, trust your instincts.
Navigate this wild ride with open eyes, and may your installations be free of magic smoke.
References
- Community Discussions and Installer Feedback via Facebook Custom Lightsaber Groups.
- Vire Sabers. "How to Build."
- Reddit r/lightsabers Community. "Welcome to r/lightsabers Wiki - Buyer's Guide."
- Nerdbot. "Inside the DIY Lightsaber: The Electronics Parts Checklist and Cost Breakdown." April 7, 2026.
- Solo Sabers LLC. "The Eternal Debate- Proffie or CFX... or Golden Harvest or Verso." April 19, 2023.
- Community Soldering and Installation Tutorials via Reddit r/lightsabers and GOTH-3Designs Padawan Tutorials.
- ProffieOS Documentation. "Proffieboard Setup."
- Adafruit Learning System. "Prop-Maker Lightsaber: Blade Construction."
- CCOHS. "Metalworking Machines - Lathes."
- The RPF (Replica Prop Forum). "First lightsaber build."
- Community 3D Printing and Fusion 360 Tutorials via YouTube.
- Community Weathering Tutorials via Reddit r/lightsabers and YouTube.